Keeping a home clean and tidy often starts with a reliable vacuum cleaner. However, when issues like weak suction, strange noises, or poor cleaning performance arise, it can feel frustrating. The good news is, these problems can usually be fixed without the need for expensive professional help. Vacuum cleaner repair is a task that many homeowners can handle on their own, with a little guidance and the right tools. Understanding what causes these common issues and how to fix them will save both time and money in the long run.
Common Vacuum Cleaner Problems
Before jumping into repairs, it’s important to understand what’s causing your vacuum cleaner to act up. There are several potential culprits behind a malfunctioning vacuum, and pinpointing the problem will save you time and effort when performing the repair.

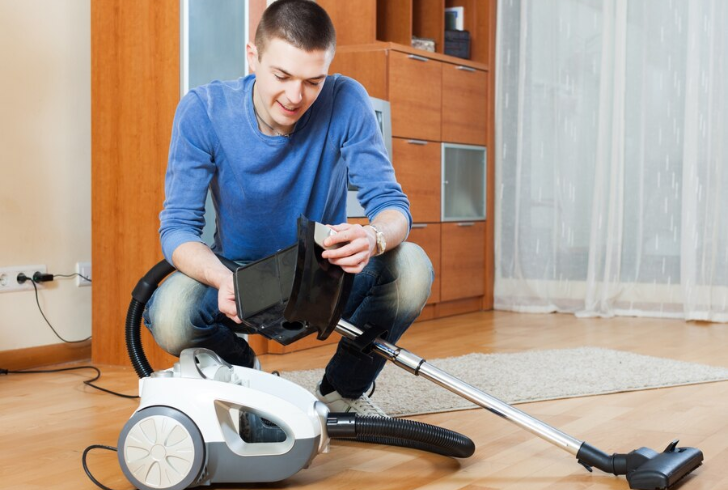
Freepik | Clogged hoses, filters, or bags hinder a vacuum cleaner's ability to efficiently suck up dirt and debris.
Here’s a look at some of the most common reasons why a vacuum cleaner might stop working effectively:
1. Clogs and Obstructions - A vacuum cleaner’s suction power is directly affected by blockages in the hose, filter, or bag. These obstructions prevent the airflow needed for optimal performance.
2. Worn or Broken Belts - If the belt that connects the motor to the brush roller is broken or slipping, the vacuum won’t be able to clean efficiently.
3. Full Dust Bag or Bin - When the dust bag or bin is full, it restricts airflow and reduces the vacuum’s suction power.
4. Overheating - Prolonged use can lead to overheating, which might cause the vacuum cleaner to shut off unexpectedly.
5. Power Issues - If the vacuum isn’t turning on at all, it might be an issue with the power cord, switch, or electrical components.
6. General Wear and Tear - Over time, components like the motor or brushes can wear down, affecting the overall functionality of your vacuum.
Addressing these issues early on can help prolong the life of your vacuum cleaner, keeping it running smoothly for longer.
Disassembling Your Vacuum Cleaner for Repair
Once you’ve identified the problem, you’ll likely need to disassemble the vacuum cleaner to access the components that need fixing. The disassembly process can vary depending on the type of vacuum you have. There are generally two main categories - upright and canister vacuums.
Here’s a basic overview of how to take apart each type.
Upright Vacuum Cleaner
For an upright vacuum, start by unplugging the vacuum and removing any detachable parts, such as the hose or handle. Next, remove the screws securing the bottom cover, which will give you access to the brush roller and belt. Once you have access, check the belt for wear and replace it if necessary. If the motor needs repair, you may need to remove additional screws to detach it.
Canister Vacuum Cleaner
Canister vacuums typically consist of a main body, hose, and nozzle. Start by unplugging the vacuum and removing the hose and dust bag. Next, unscrew the body to access the motor and other parts. If the motor or brush roller is faulty, carefully remove it and inspect for damage.
DIY Vacuum Cleaner Repair Tips
Once your vacuum cleaner is disassembled, it’s time to get to work on the repairs. Here are some common vacuum cleaner repair tasks that can often be done at home:
1. Fixing or Replacing the Beater Bar
The beater bar is the rotating brush that helps pick up dirt and debris from your floors. Over time, it can become clogged with hair or other debris, or the brushes may wear down. To repair the beater bar, start by removing the vacuum's bottom cover and the drive belt. After taking out the beater bar, inspect it for damage. If necessary, replace the brush or the entire bar.
2. Replacing the Vacuum Belt
A broken or worn-out belt is a common issue in vacuums with motorized brush rolls. If the belt has slipped off or is no longer working, it needs to be replaced. After removing the beater bar, loosen the old belt and replace it with a new one. Reassemble the vacuum and test it to ensure the brush is spinning properly.
3. Cleaning or Replacing the Vacuum Filter
A clogged filter can significantly reduce the suction power of a vacuum cleaner. Depending on your model, you may have a foam filter, a pleated paper filter, or a HEPA filter. Clean foam filters by washing them in warm water and mild detergent. For pleated or HEPA filters, rinse them under water to remove dust and debris. If the filter is too worn out, replacing it might be necessary.
4. Emptying or Replacing the Vacuum Bag

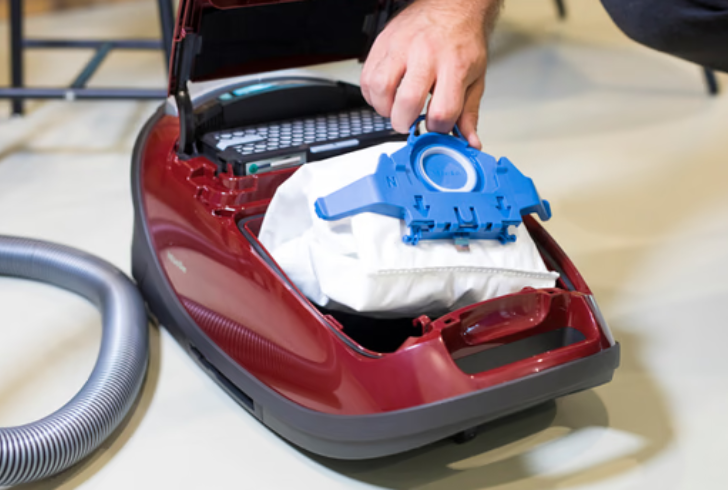
linkedin.com | Don't let a full bag sabotage your cleaning! Empty or replace it for optimal suction.
If your vacuum uses a bag, a full or clogged bag will reduce suction and cause the vacuum to lose power. Open the vacuum and carefully remove the bag, ensuring it's emptied or replaced with a new one. If the bag is damaged or overly full, it’s time for a replacement.
5. Unclogging the Hose
The hose can easily become clogged with debris, particularly if you’re vacuuming up larger items. To clear a clogged hose, detach it from the vacuum and check for blockages. Use a broomstick or similar long object to gently push the debris out. If the clog is deep, consider using a flexible cleaning tool like a plumbing snake to clear it.
6. Fixing the Power Cord
Sometimes, a faulty power cord can prevent the vacuum from turning on. Inspect the cord for any visible damage, such as fraying or cuts. If the power cord is damaged, it may need to be replaced. In some cases, you can reconnect the cord if the issue lies with a loose connection.
When to Seek Professional Help
Not all vacuum cleaner issues can be fixed through DIY repairs. If you’ve tried the above solutions and your vacuum is still not working, or if you’re unsure about handling electrical repairs, it may be time to consult a professional. An expert will be able to diagnose more complicated issues, such as motor failure or electrical problems, and perform the necessary repairs safely.
By following these simple vacuum cleaner repair steps, you can keep your vacuum working efficiently for years to come. Regular maintenance, such as cleaning filters and replacing belts, will help prolong the life of your vacuum and ensure it continues to perform at its best. Remember, even if you're not a DIY expert, taking the time to inspect and maintain your vacuum can save you time and money on expensive repairs.


